When this couple built their home in 2007, they were young, ambitious, and just beginning their family and business. Back then, design choices were less about “what we love” and more about “what our parents did.” The builder made most of the calls, and the couple was happy to have a kitchen that simply worked.
Fast forward to their forties, and “just working” wasn’t cutting it anymore. The once-loved peninsula with its raised snack bar had become more of a blockade than a feature. Storage felt awkward, the layout felt dated, and the kitchen—the heart of the home—wasn’t keeping up with the rhythm of their busy family life.
It was time for a transformation.
Step One: Opening Up the Kitchen
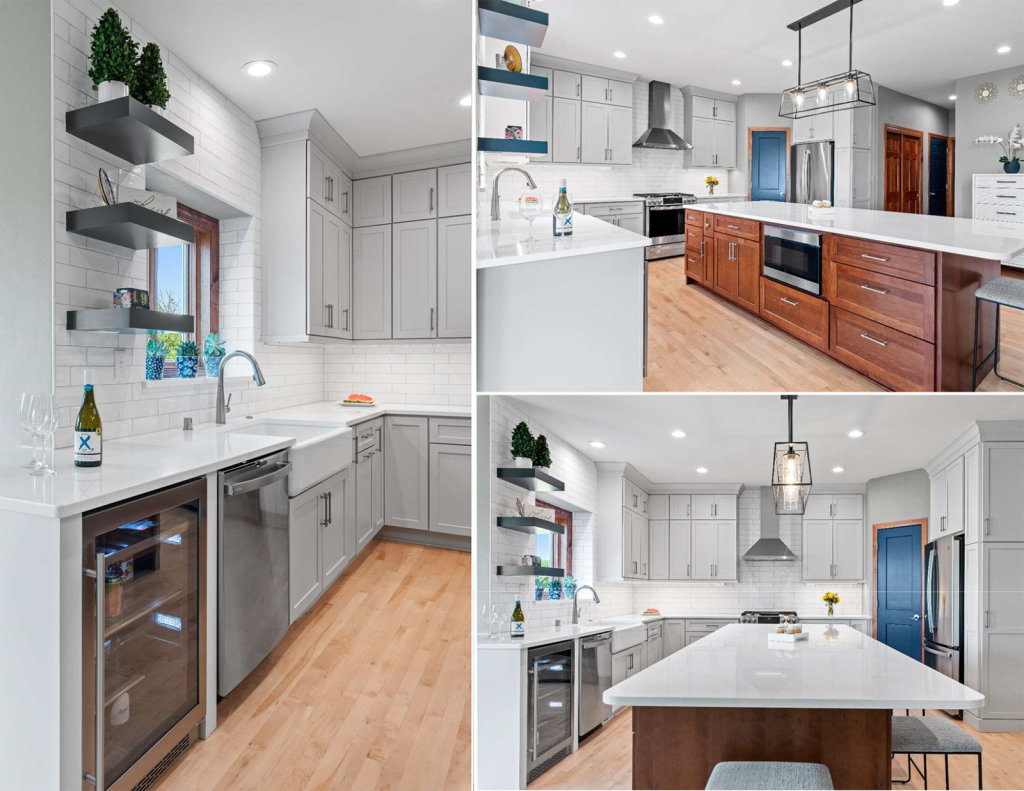
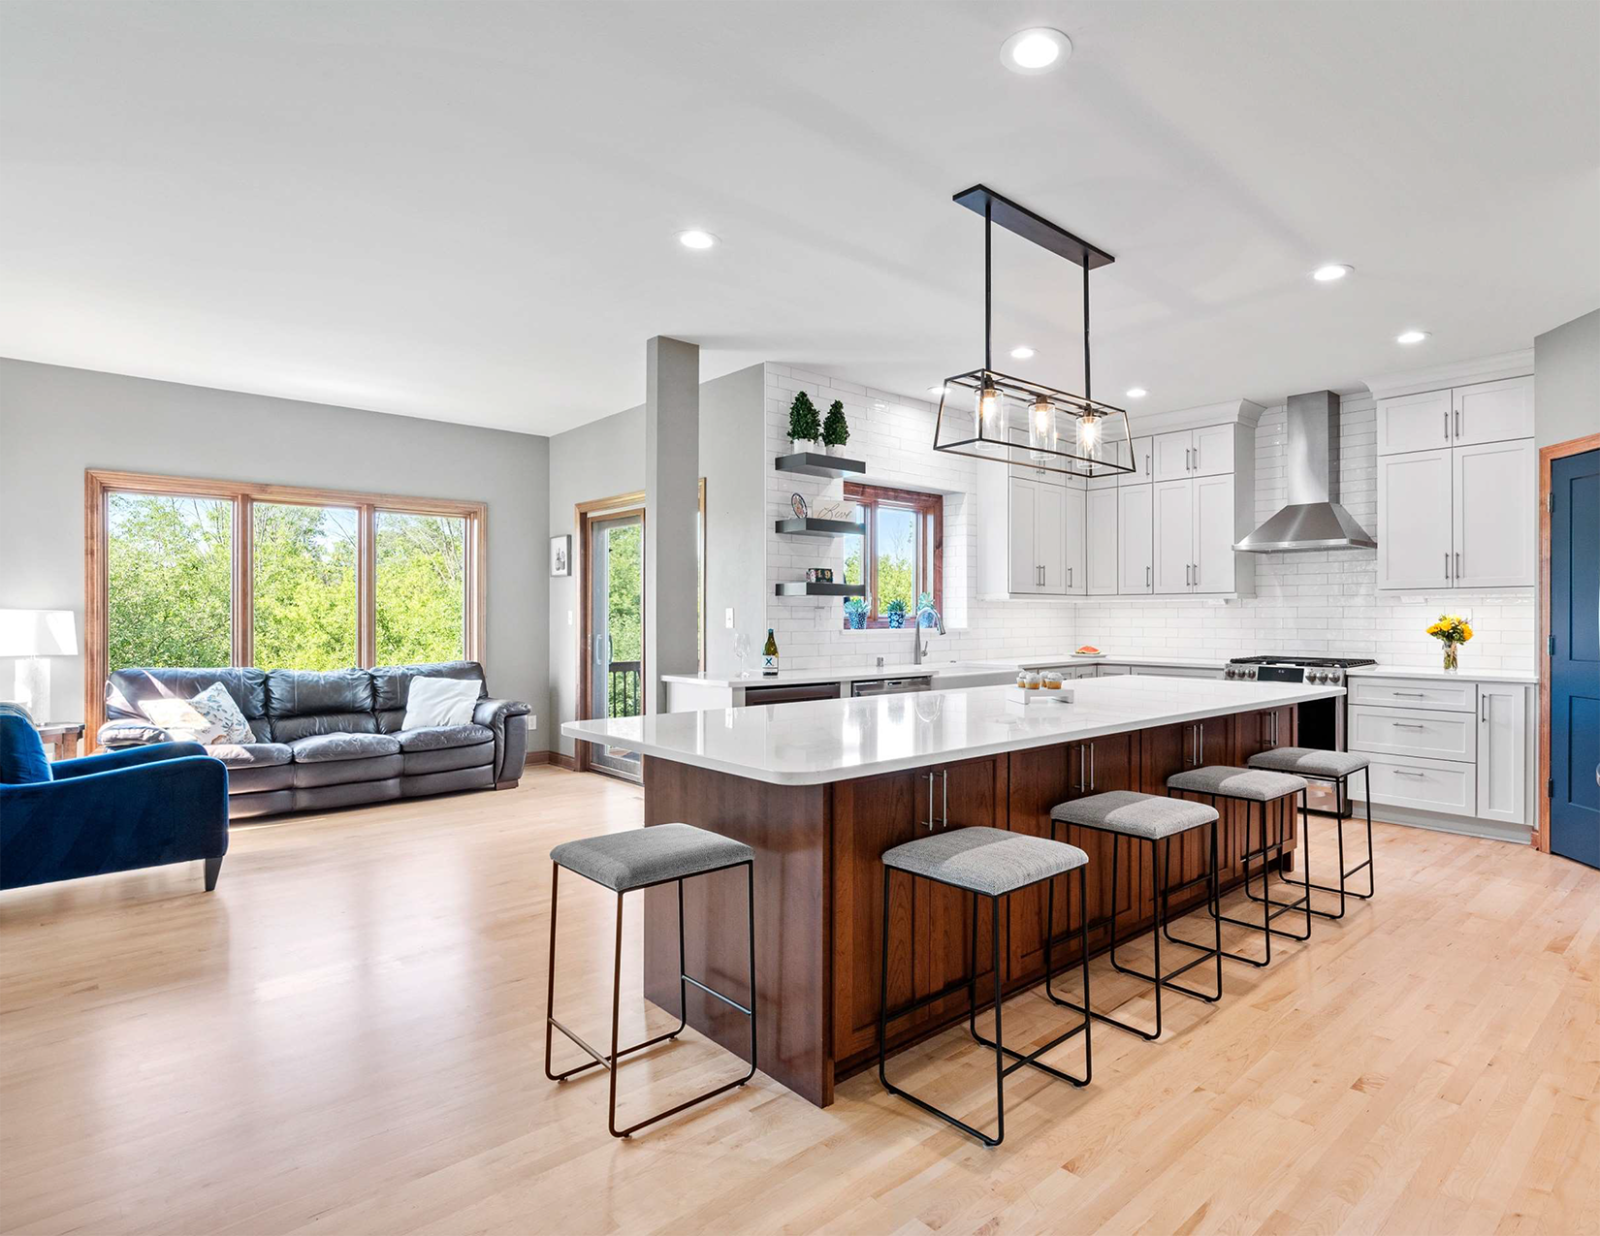
The first target? That peninsula. Once prized for its snack bar, it now stood like a wall between the kitchen and the rest of the house. Out it went. In its place rose a generous island with storage on both sides. It wasn’t just pretty; it was practical. The quartz slab countertop now serves as a food prep zone, homework station, gift-wrapping hub, and, of course, the family’s favorite spot for casual meals.
The beauty of this remodel was that the appliance locations didn’t need to be moved. By working with what was already there, the new design delivered a fresh, open layout without unnecessary complications.
Step Two: Confirming the Layout
With the peninsula gone, it was time to rethink cabinetry. The couple had grown weary of the tiny, useless drawers in their old kitchen, so wide drawers—both shallow and deep—were placed on either side of the range. A sleek chimney-style range hood, vented to the exterior, replaced the old unit, bringing both function and easy cleaning.
Not everything went smoothly, though. The homeowners had dreamed of removing a wing wall between the kitchen and sitting area, only to discover it was holding up the second floor. Surprise! Instead of giving up, the design team wrapped the column in drywall and extended the countertop through the opening, still achieving a sense of connection between the two spaces.
Step Three: Colors and Materials
Once the bones were in place, personality came into play. The new island, stained to closely match the home’s birch trim and pine doors, instantly grounded the space. The microwave, once a countertop clutter culprit, was tucked discreetly into the island in a drawer-style unit with hidden controls.
The couple also wanted a splash of blue—literally. After debating tile accents, they landed on painted floating shelves near the sink and a bold blue pantry door. The cabinets themselves were painted in a tonal white, shifting subtly with the light throughout the day—sometimes bright, sometimes gray. Together, the palette balanced classic warmth with contemporary style.
Step Four: The Details
No remodel is complete without thoughtful touches. The homeowners insisted on a charging station for their rechargeable stick vacuum, cleverly tucked into a shallow cabinet with an outlet. They also disliked outlets interrupting the beauty of a tiled backsplash, so they were hidden under the cabinets instead. Light rail molding both concealed the outlets and provided space for bulky plugs and transformers. Even at the floating shelves, outlets were tucked neatly into the underside.
A Kitchen Ready for the Next Chapter
The transformation was more than cosmetic. By opening up the layout, maximizing storage, and layering in smart details, the kitchen now functions beautifully for the family’s daily life. It’s a space where meals are made, homework is done, parties are hosted, and life happens—all without a peninsula in sight.
Sometimes, the best remodels aren’t just about new cabinets or shiny counters. They’re about creating a space that finally feels like yours. For this family, the new kitchen is exactly that: functional, personal, and ready for the next decade of memories.